D.I.Y. paraglider line measuring device
Note these drawings were made after making the real device, so may not be
accurate.
This description is from the third version I made, borrowing parts and ideas
from earlier versions. For me, it a reasonalble endpoint, working well enough.
If you want to build your own device, it could be a starting point. Of course
am I very interested in your solution. If you then start to make
millions with your design, please think about your inspiration :-):-) ?
Riser ruler, lower part
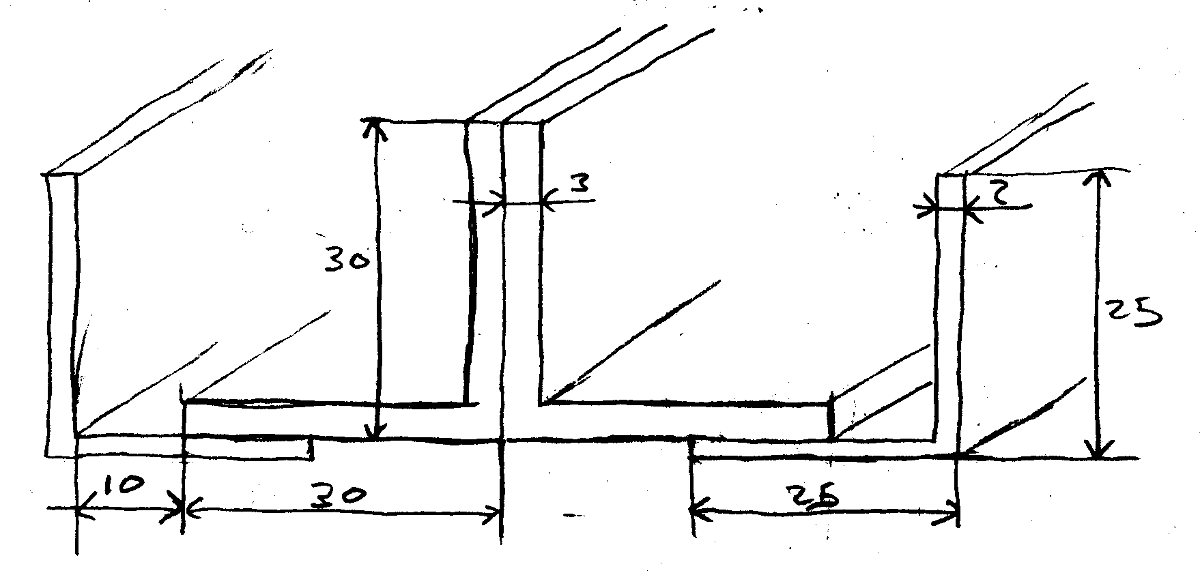
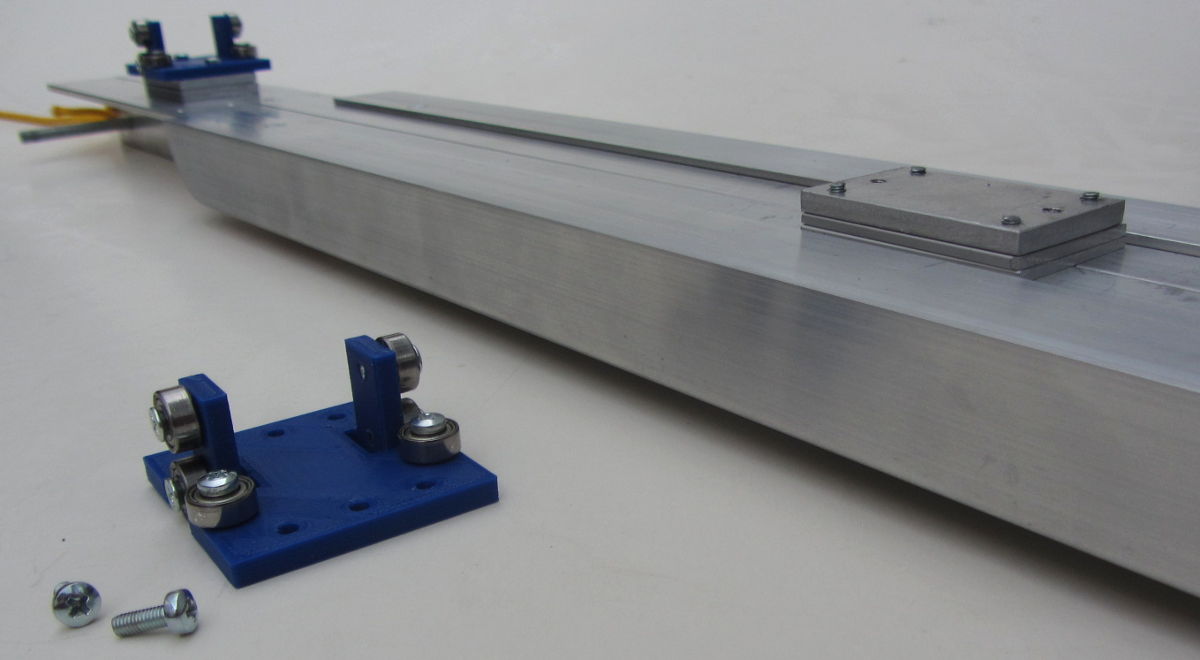
The base of the ruler consists of three aluminium profiles:
- one U-profile, width 50 mm, height 25 mm, length 800 mm, thickness 3 mm
- two L-profiles, width 10 mm, height 10 mm, length 800 mm, thickness 2 mm
The profiles are connected with four M3 flathead screws, threads cut into
the U-profile, sunken into the L-profiles. 5mm screw length is always ok, 6 mm
only with the newer, narrower trolley.
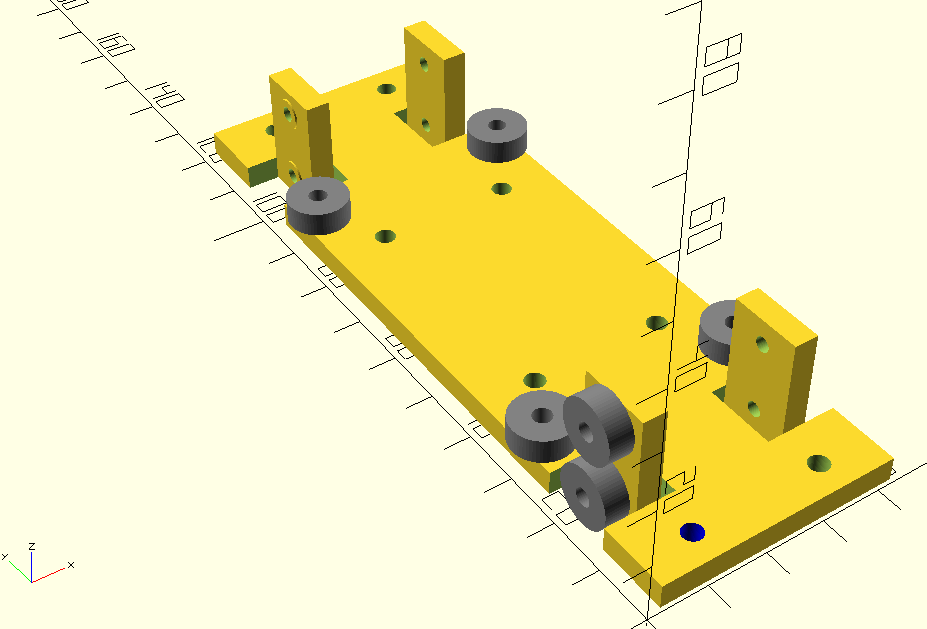
Up-side-down OpenSCAD drawing of the riser-ruler half pulley. Two of
these are attached to a connection plate and slide inside the ruler. The
green holes are for the screws and the gray cylinders are a stand in for the
bearings (not to be printed). The bearings are connected to the trolley with
M3 flathead screws, threads are to be cut into the 3D-printed part.
The bearing sizes are: 4 x 10 x 3 mm (Type: MR623ZZ). The screws are M3
flathead, 10 mm for the top and bottom bearings, and M3 x 8 convex head for
the sideways bearings.
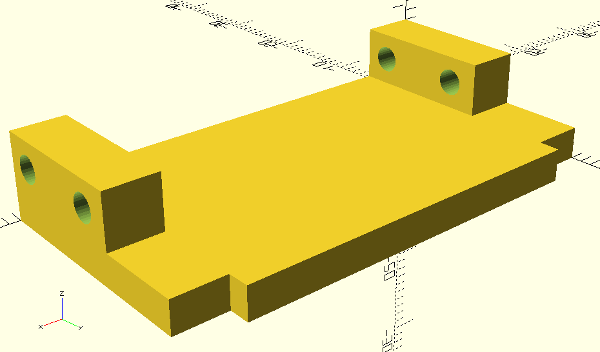
There are two versions of this 3D-printed part, the older (riserTrolley1)
requires 5 mm screws, the newer (riserTrolley2) fits with 6 mm, more common
screws. This at the price of less contact surface for the top bearing.
The trolley is attached to an intermediate plate (aluminium, 30 x 45 x 4 mm)
with two convex head M3 screws of 8 mm.
The stop plate keeps the trolly inside it is attached with two M3 screws,
12 mm, flathead. M3 thread is cut in the holes. Cut the tread carefully, the
printed part might split. Drilling the hole up to 2.5 mm first reduces the risk.
The pulley plates keep the trolley from escaping the ruler and keep the
weight trolley in place. The small holes are cut with M3 thread. Threading the
aluminium profile would be better, but the design would be even less elegant.
Keep in mind while printing, that one of the two plates should be mirrored.
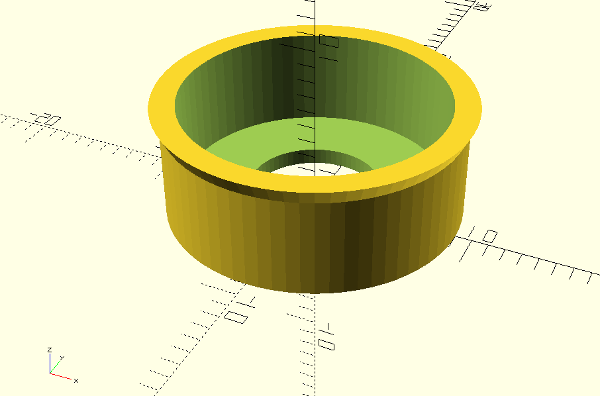
The filler interfaces between the 5 x 16 x 5 (Type: MR625ZZ) bearing
and the 20 mm diameter aluminium tube (18 mm inside). The bearings use flatheaded
scews because these heads are less high.
Barely visible are the filler plates between the intermediate plate and the
riser guides.
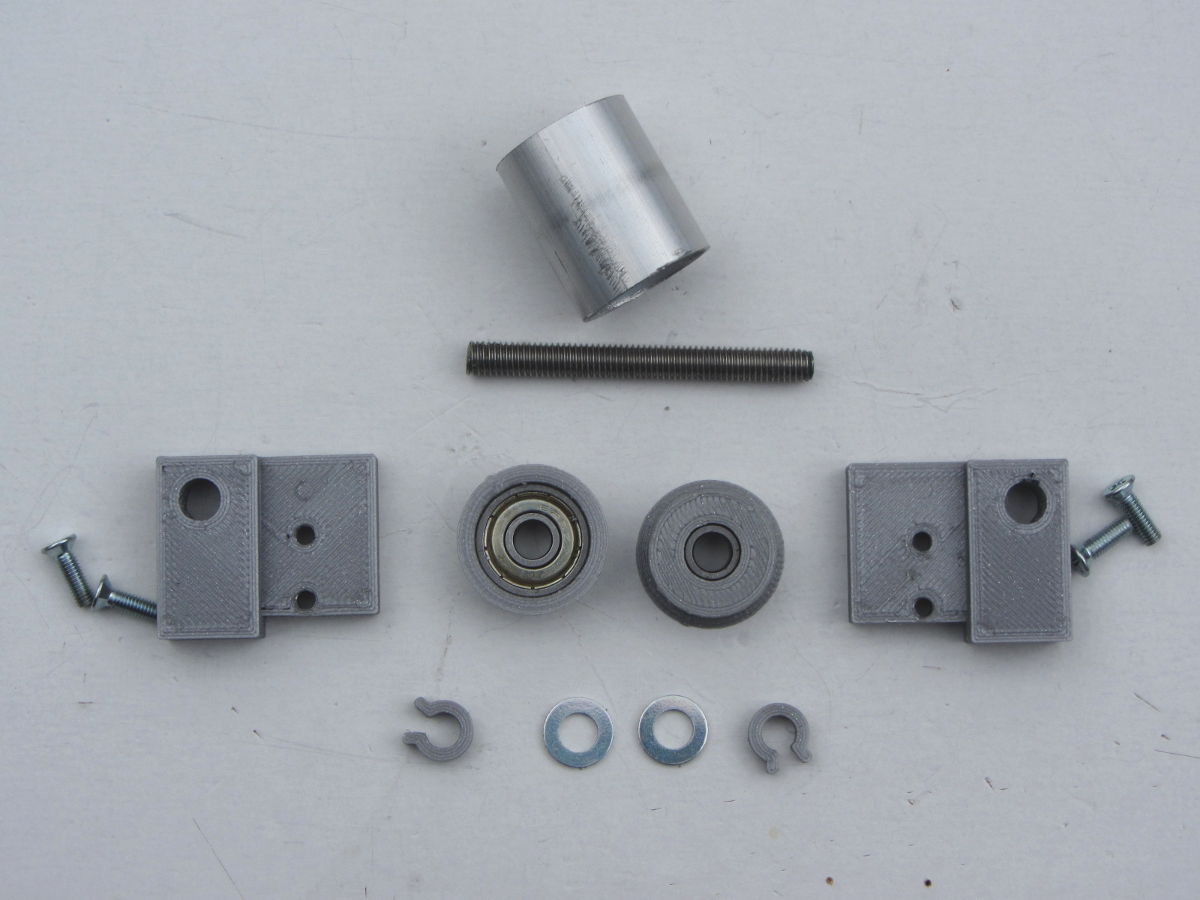
The axis length between the two end stop plates and pulley is filled up
with clamps and washers. The axis is a 48 mm M5 thread.
Riser ruler, upper part
The riser guide consists of four aluminium L-profiles:
- two profiles, width/height 30 mm, length 600 mm, thickness 3 mm
- two profiles, width/height 25 mm, length 400 mm, thickness 2 mm
The longer profiles are connected back-to-back width two M3 flathead
screws, threaded in one profile, sunken into the other
The shorter profiles are connected to the longer ones with two M3
flathead screws, threaded into the thicker profiles, sunken onto the thinner
profiles.
The shorter profiles are placed with 10 mm space, to make the guide wider
and on the line-end of the guide. Rounding of the profile corners is done where
it is in contact with risers and lines.
Endnote: The sizes and placing of the outer, shorter profiles
is a bit arbitrary. Because they are below the longer profiles, extra space has
to be created between the lower and upper ruler parts.
On the front, a riser trolley next to its mounting point. Note the
filler plates between the intermediate plate and the riser ruller upper part.
The filler height should be 3 to 4 mm. None should be needed if the shorter
L-profiles are placed on top of the longer ones.
On the back, the other riser trolley. The trolleys are situated about 100
mm from the end of the longer profile.
The brake line attachments are placed somewhere least in the way. Which
means a measurement correction has to be applied, or the target adjusted, just
for the brakelines. The choosen location is 150 mm before the riser bar, my
preferred location for the target plate. The screws are M3 x 6 mm, thread is
cut in the profile.
The riser bar is a M6 thread, 100 mm long. For additional rigidity,
M6 threads are cut into the two profiles. Two pieces of tube (8/6 mm, 40 mm
long) protect the risers from the threading. Washers and M6 end nuts serve to
keep the risers in place. The bar is located 25 mm from the end of the profile,
10 mm from the top.
The weight attachment didn't get much attention, it is just a 6 mm hole.
The target presents a 80 x 80 mm plate at the right lication for the
laser measurement device. The block at the back is as wide as the two profiles,
so two plates can be used to clamp it in place. The two green holes should have
M3 thread to keep the plates in place, the two red holes are used to clamp the
to plates together, and the plates have each one threaded hole and one 3 mm
hole with the sunken head. This design could be simplified.
The side plates are 51 x 20 x 3 mm. Each has three holes, one M3 threaded,
two 3 mm with sunken head. Two 8 mm screws, two 12 mm, all flathead.
Here the target plate with clamp plates on a white background which doesn't
work very well. The profile clamping area is quite small, and the space between
the target and the riser attachment bar is just largr enough for my risers.
More room is also more potential measurement error due to the parallax.
Measurement ruler, lower part
The base of the ruler is very like the riser ruler lower part, and
consists of three aluminium profiles:
- one U-profile, width 50 mm, height 25 mm, length 1000 mm, thickness 3 mm
- two L-profiles, width 10 mm, height 10 mm, length 1000 mm, thickness 2 mm
The profiles are connected with five M3 flathead screws, threads cut into the
U-profile, sunken into the L-profiles. 5mm screw length is always ok, 6 mm only
with the newer, narrower trolley.
The actual ruler length is a compromise between portability and the range of
line lengths one want to measure. One meter might be just too short for full
size paraglider line lengths.
The laser trolley rides inside ruler, lomiting the movements of the
measurement device to one axis; pointed ate the measurement target. Bearings
provide a smooth movement. Steel bearings in an aluminium profile could give
problems with heavy use. Periodically cleaning the ruler inside might migitate
this somewhat. Screws for the sideways facing bearings are M3 x 8 mm, convex
head. Screws for the top and bottom bearings are M3 x 10, flathead.
There are two versions of this 3D-printed part, the older (laserTrolley3)
requires 5 mm screws, the newer (laserTrolley4) fits with 6 mm, more common
screws for the ruler top L-profiles. This at the price of less contact surface
for the top bearing.
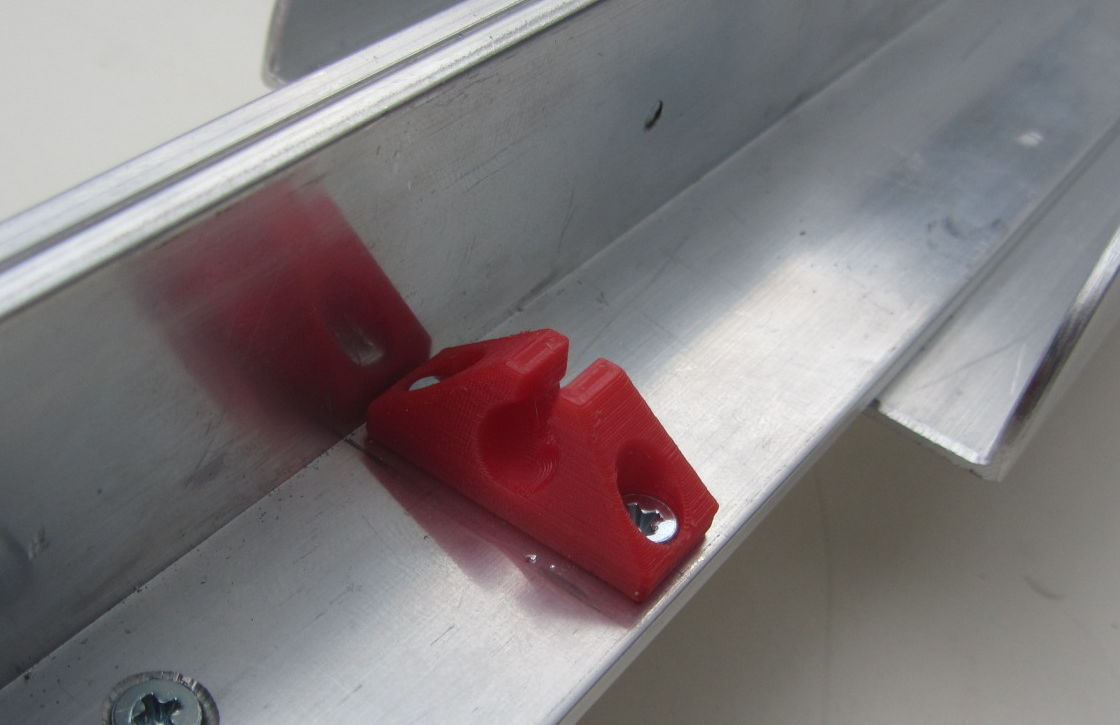
This part is the same as the end stop for the riser ruler.
The measurement ruler intermediate plate is an aluminium plate 145 x 30
x 4 mm with M3 threaded holes for the laser trolley (the four inside trolly
holes), the measurement device cage and the handle/line attachment.
The holes are indicated with letters: L - laser cage, T - trolley, H -
handle and measurement profile. Dimensions could be added, but more important
is that it all fits in combination on this intermediate plate.
Measurement ruler, upper part
The laser cage is designed as a tight fit for the Leica Disto D110
(E7100i). It encloses the device from the front and sides, the bottom rests
against the line attachment profile, as this is the measurement reference.
The cage is attached to the intermediate plate with four M3 flathead screws,
approximately 5.5 mm long.
Replacing the measurement device is as easy as creating a cage for the new
device. Only the mounting point square of 40 x 22 mm, 42 mm fore the back of
the device should have to be respected.
The D110 case is somewhat tapered, so a correction is needed to get it
horizontally oriented. A aluminium plate sized 20.5 x 19 x 2 mm in the
attachment hole corrects this.
The profile is a 20 x 30 mm L-profile, 110 mm long. The function of the
profile is to create a rigid connection between the line attachment and the
handle, this being the chain transferring the measurement force, created by
lifting the 5 kg weight. The M3 screws (convex head) used to connect the
profile and handle to the intermediate plate should be the thickness of all
three; 2 + 3 + 4 = 7 mm.
The line attachment plate is attached to the same side or the measurement
profile as where the measurement device rests. This means no corrections have to be
applied for this side of the rig, assuming the profile is perpendicular to the
measured line. The detachable plate makes customizing the line-measurement device
easy. These were the reasons for the somewhat elaborate construction. The
screws are M3, convex head, 4.5 mm.
The handle is a aluminium strip, 220 x 30 x 2 mm. The curve is created by
bending it around a shaped piece of wood. It didn't look very good at first,
but turned out to be ok. The piece of wood could be a bit of a broomstick.
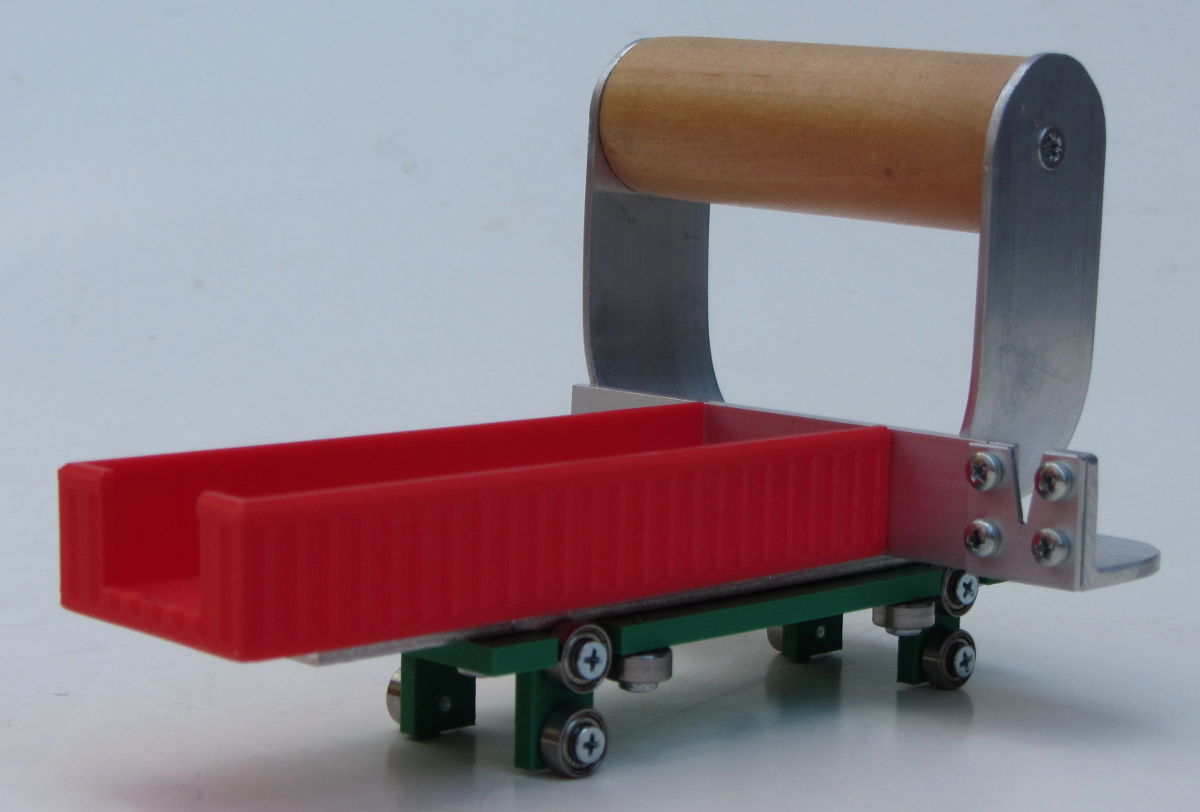
The complete moving assembly of the measurement ruler.
Weight
The weight is based on old cheap clock weights, supplemented with an
thinner iron stave to get the required 5 kg.
Had I started from scratch, I would have started with three same diameter
iron staves with the proper length to get the required weight.
The length of the staves is 230 mm, the diameters are 38 and 25 mm
3D-printed parts
All parts are printed with PLA, 0.2 mm layer thickness, 15% filling. PETG
would work too. For the parts with M3 treads, I use 3 perimeter layers, as
some material is removed. Standard are two layers.
The parts are provided as .STL files, which any slicer or printer service
should be able to handle. The included OpenSCAD files are needed if you want
want to tune the shapes. Note these can be rather messy.
fjkraan@electrickery.nl, 2018-05-26


